Categories
Apparel Gear

Review: Shimano MT60 SPD Touring Shoes

Summary: Acceptable shoes for touring, reasonable to walk in, but Gore-Tex is not a great fabric for shoes, as they fill up with water in heavy rain.

Details:

The “Shimano MT60 Gore-Tex Bike Shoe” was sold as a commuting/touring/mountain biking SPD-compatible shoe. They are less obviously “cycling” shoes than some others on the market. When new they look like this:

After many years of use, they look more like this:

Well-worn shoes, holding up OK

As the name suggests, they are made with Gore-Tex waterproof fabric. They have a fairly stiff sole, but with enough flexibility to walk. They are SPD-compatible. You can leave the sole plates in place, and use them without SPDs if preferred.

Earlier models had a velcro strap that held the laces down. These ones have a simple elastic band for tucking spare laces into.

Fit: Shimano runs a little small with their sizing. I normally wear a US 11.5, but in this case went with the EU 47.

Usage:

Long-term readers will know that I have favored SPD-compatible sandals for long-distance touring. Horrifically ugly:

Dirty and dusty, ugly but comfortable sandals

With matching tan/dirt lines:

Horrific tan lines from long days in Shimano sandals

I wore Shimano SPD sandals for long periods on the road. Later I got some Exustar SPD sandals. Just as ugly.

But when I was touring in Patagonia, I knew the weather would be mostly cool and wet, so wanted to just take shoes. These were the only shoes I took on this trip, for both cycling and walking. Here they are in action on the side of the road:

Shoes in action in Patagonia

Note the wet weather gear – that was the sort of conditions these were designed for.

When not touring, these were my only SPD shoes. If I was going mountain biking, or riding my touring bike in cool/wet conditions, I would wear these. They’ve had plenty of on- and off-road usage.

Likes:

  • Styling was (for the time) low-key. There are much better options today for shoes that don’t scream I’M A CYCLING NERD, but in 2009 there were not as many options. They looked like typical “Westerner traveling abroad” shoes.
  • Pretty good for walking around. Obviously some scraping of the cleats, and the soles are stiffer than regular shoes, but they are fine for walking.

Dislikes:

  • The waterproof fabric seems like a good idea. And if you step in small puddles, it seems great. But on very wet days, you will get water splashing up from your bike and cars, and the shoes will tend to fill up with water. They don’t drain. Better to wear Sealskinz waterproof socks instead.
  • Laces are too long, and the elastic holder stretches over time, so the laces are not held in, and are prone to tangling with your chain ring.
  • The sole is not well-suited for pushing your bike up muddy MTB trails. I wore mine mountain biking because that’s what I had, but if you’re looking for a dedicated MTB SPD shoe, consider other designs.

Verdict:

Would not buy again. Nothing against Shimano shoes, the price/quality was fair, but I would not buy Gore-Tex cycling shoes again.

Categories
Apparel Gear

Review: Gore Windstopper Element Jacket

Summary: Highly recommended, a much-loved jacket, perfect for dry, cool conditions. Packed small, nice against the skin, and kept me warm in cold winds. Quality gear from Gore.

Gore Windstopper Element Jacket

The Gore Windstopper Element jacket is a lightweight convertible jacket, made of Gore-Tex Windstopper fabric. Gore makes a range of cycling and running clothing, all of it high quality. Not cheap, but fits well, and is well-made.

I purchased this jacket while touring across Europe and Asia. I found that regular Gore-Tex fabrics were not good in the cold wind, and that was more of a problem for me than rain. I needed a lightweight jacket that blocked wind, and gave some lightweight rain protection.

Here’s the jacket in use, somewhere in China:

Not my best look: jacket, socks & sandals. Warmth with minimal bulk

Later it became my go-to jacket for mountain biking. I could put it on in the morning, wear it until I warmed up, and then either remove the sleeves, or just unzip the arm holes a bit for breathability. Here’s a shot riding in Taupo – note the frost on the ground. That’s at 4pm – it was a cold day, but I’m warm and comfortable.

Cold, frosty day – perfect conditions

The sleeves could be completely removed and put in the rear pocket, and the jacket itself could be stuffed into its own pocket.

Likes

Warm on cold mornings, but then can easily unzip the sleeves as you warm up, or remove them or the entire jacket, and stuff it in your Camelbak/pannier.

Blocks cold winds, yet remains breathable. Feels very nice against the skin. Not clammy, not prone to overheating. This, plus an insulating merino layer, along with a Buff and maybe a skull cap, keeps you comfortable even below freezing.

I like having the ability to convert it to a vest by removing the sleeves, even though I don’t often use it that way. It’s good to have it there.

Dislikes

No major quibbles here. The main issue is rain proofing: it’s not designed to keep you dry all day. When it was newer, the water would tend to bead and run off. As it got more worn, it would tend to soak in the water. It won’t keep you dry in all-day rain, but that’s not its goal. It will keep you dry in light showers, and you should be warmed up by the time it starts raining harder.

Verdict

This has been a great jacket. Highly recommended, particularly for cool, dry conditions. Not great if you often ride in the rain, but good for most of us.

Quality gear from a company that consistently makes nice riding gear.

The Replacement

After many years of use, the main zip started failing. I investigated alternatives, but Gore was always going to be my first choice. I ended up with the current version of the Element jacket. This is basically an updated version: it’s still Windstopper fabric, with removable sleeves.

We also purchased one for Anna:

Tweedledum & Tweedledee, matching jackets

Note that mine is black, with yellow back & sides:

Side view – note the yellow back

I much prefer the color of Anna’s jacket, or perhaps the blue. But the only color I could get was black/yellow.

The new model is good, but not quite as good as the older model. No hand pockets, but it does have a chest pocket suitable for storing your phone.

The inside of the jacket lacks any mesh, so it’s not quite as nice against the skin. It’s not far off though. Definitely not like other fabrics that can be clammy. Feels smaller & lighter, but still completely blocks out the wind. In those photos above, temperatures were near freezing, with strong cold winds, but we were happy in our jackets.

Hopefully another ten years of wear from these?

Categories
Blog MTB

Northland Boys 1st Time Camping With His Girl

MTBing Fort Ord

This post is really about the camping, but before we went camping we went riding in Fort Ord. Fort Ord is a former military post which is now a part of the National Conservation Lands in Monterey County, California. We thought the ride started out a bit dull. Lots of hard pressed clay and sand on what appears to be low level sparse scrub. We took a fairly easy ride up to the top of the hills, and stopped to look out over the views.

Atop Ford Ord, looking out over the valley we were about to drop into.

However, once we rode into the valley, the path became surprisingly beautiful. May/June is a wonderful time of year in California. Not long after the winter rains, but before the dry season stretches out. The flowers were blooming; the bush and grasses were green, and the pathway that wound us through this terrain was stunning.

The photo does not speak to the beauty of these green, shadowed pathways.

Camping Arroyo Seco

We were running short on time unfortunately, and didn’t get to explore as much we’d have liked. However, we were keen to get to our camping spot.

Trial run, inside the safety or our lounge.

We’re thinking about getting our bikes on the road again for another tour, so are starting to update some of the gear. Lindsay recently decided to purchase a new light weight tent, the Big Agnes Copper Spur with lights.

So we’ve decided to do some vehicle camping to try out the new gear, and for our first last minute trip we decided to head to Big Sur. But every campground in Big Sur was all booked out unless we wanted to pay $100 + taxes to pitch our little tent.


A friend told me about a place to stay on the east/back side of Big Sur called the Arroyo Seco Camping Ground. It was all booked out, but with seven drive up spots, we thought we’d try our luck. Luckily we got the last spot. We were thrilled with the $25 charge, and they also sold ice and firewood. Perfect.

Oh how we laughed. Signage to the ‘Primitive Sites’.

We drove through the park to the ‘primitive sites’ where we pitched our tent for the second time, this time outside! The ‘primitive’ sites at this campground came with long drop (aka ‘pit’) toilets, a camp site with parking for one car, a camp table, bbq/grill and fire pit.

Second run. Big Agnes is up and ready for sleeping in.
Lindsay took a quick leap into the water. He may look like he’s basking, but he’s really quite chilly.

Feeling hot and dusty from our ride earlier in the day, and from mucking in at the camp site, we decided to go for a swim in the river that ran through the bottom of the campsite. We braved the cool waters, and took a refreshing dip.


Big smile showing off my plastic teeth (Invisalign). I took the slow approach into the river, but stayed longer.
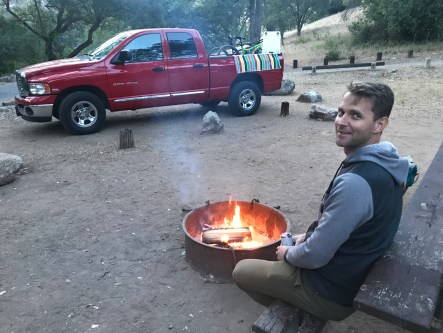
Very proud of his fire…albeit very smoky as the night progressed.


Lindsay was the star of this camping show. One would hope so considering how much camping he’s done! He built a large fire, which we then spent the night attempting to escape as the smoke seemed determined to follow us, no matter where we sat. He taught me to use his small portable stove…I burnt the porridge the next morning!


Hmmm…an acceptable sleep. Much practice needed.

We had to buy suitable bedding for me. I’m a stomach sleeper and I’m in love with my pillow. A lot of campers sleep on their back and use some clothes to rest their head on. Not me…I need a little comfort. We settled on a light weight Therm-a-Rest Neo Air XLite sleeping pad & Compressible Pillow. I slept okay but I think this sleeping/camping thing will take a little while to get used too!


Somehow I got suckered into the tyre pumping. I’m amazed at how well a MTBing tyre pump is suited to this work.


I’d noticed the evening before that truck’s tyre was a little deflated. By morning the rim was almost on the ground. We took turns using the bike pump to inflate it to see what the problem was. It was leaking around the value, so we put the spare on, so now Lindsay is an expert truck tyre changer! Fortunately Rodney (The big red truck) has a lot of clearance for Lindsay to climb under, to sort the spare.

The road out ran aside the Arroyo Seco River, making for a picturesque drive.

Unfortunately this all took some time. We’d hoped to head back into Big Sur national Park to do some exploring but were out of time. So we headed out of the valley, through this amazing part of California with its sprawling agriculture, and went exploring in the coastal towns of Carmel and Capitola on the way back home to San Francisco.

Placidly roaming wild stock that had escaped his pastures. This single fellow had held up traffic and had 2 or 3 police cars helping to wrangle him in again.

SaveSave

SaveSave

SaveSave

SaveSave

Categories
Bags Gear

Review: Ortlieb 5 Plus Handlebar Bag

My Ortlieb Ultimate 5 Plus Handlebar Bag lasted 50,000km and 11 years, but it’s time for retirement. Here’s a review showing how it held up, what I liked & didn’t, and the replacement.

I’ve had this bag since August 2007. I use it when touring for putting most of my valuables in. I can quickly take it off the bike, and use the shoulder strap for walking around. My snacks for the day would usually be in the bag, for easy access. If I’m just going for a day ride I would often take it. Good place for wallet, tools, keys, phone.

Here’s its first outing, leaving Bishkek, Kyrgyzstan:

First day of use, in front of Lenin

And here it is 11 years later, looking somewhat battered and faded:

Barbag mounted on T-Bar below handlebars

Note the mounting: I mounted it on a T-Bar beneath my handlebars.This was because I used to have carbon handlebars, and the Ortlieb mounting system does not work with carbon bars. It also frees up some handlebar space putting it out lower.

It uses a Klickfix-compatible clip that is super-easy to clip/un-clip. Push forward on the lock barrel, push the bag up from underneath, easy. Putting it back on is faster – line it up, drop down and it clips in place. Very secure on the bike though – the clip never even came close to coming loose.

Prior to using butterfly handlebars, this lower position was good for stretching out and resting my arms on, when riding long distances on good roads, into the wind.

The map case attachment was sold as a separate add-on. This was “guaranteed not to yellow,” but don’t believe it: everything is affected by the sun. This is the second map case, as my first one was much more yellowed, and developed a crack.

Map case – somewhat yellowed

Check the fading here, in the areas that were not covered by the map case. No issues with any leaks, rips or tears. The fabric stayed strong, and everything stayed dry.

Top view – note fading where more exposed to sun

Note the dome clips used for the map case. Two similar clips were used to close the lid. These were awkward to open when riding, and very difficult to close. You had to stop to do it. I’m sure this makes sense to people in a factory considering safety first, but the reality is that on the road, sometimes you don’t want to stop to grab a snack, but want to just keep on rolling. Or maybe you need to grab your camera in a hurry.

You can also see in the above shot that the lid has a tendency to fall in on itself. Technically this doesn’t matter – if there was anything in there it would push back against it. But it always annoyed me when it looked like that.

There were two small exterior mesh pockets, one on each side. I would put a snack bar in one side, my multitool in the other. Eventually the pockets came off, as you can see here:

Side pockets *were* here

The interior had a zip pocket + key clip – useful for keys + phone, and an interior divider. This divider seemed like a good idea, but in practice it was just a pain in the ass. It was not fixed in place, and would move around, and everything would end up underneath it. More trouble than it was worth.

Internal divider

Verdict

I never loved this bag. But you know what? I kept using it for over ten years, and it did what it said it would. It kept my gear dry and secure, along good roads, rough roads, dirt roads. It was was easy to take on or off, it was just a bit of a pain to open & close. It’s only in the last couple of years that bits started breaking, and it started looking pretty old. If it were not for a good deal on a replacement at REI, I would have kept using it for a while yet.

Summary: Not great, but did the job. The Ortlieb price premium was worth it for something that lasted a long time.

The Replacement

I have replaced it with the Ultimate6 S Plus.

This is a smaller, updated model. Similar shape, but smaller, and no side pockets. It addresses several issues with the original: the map case is integrated, and is designed for a smartphone (you can use a touch screen through the plastic).The catch is magnetic, making it easier to open with one hand.

Here’s to another 10+ years and 50,000km?